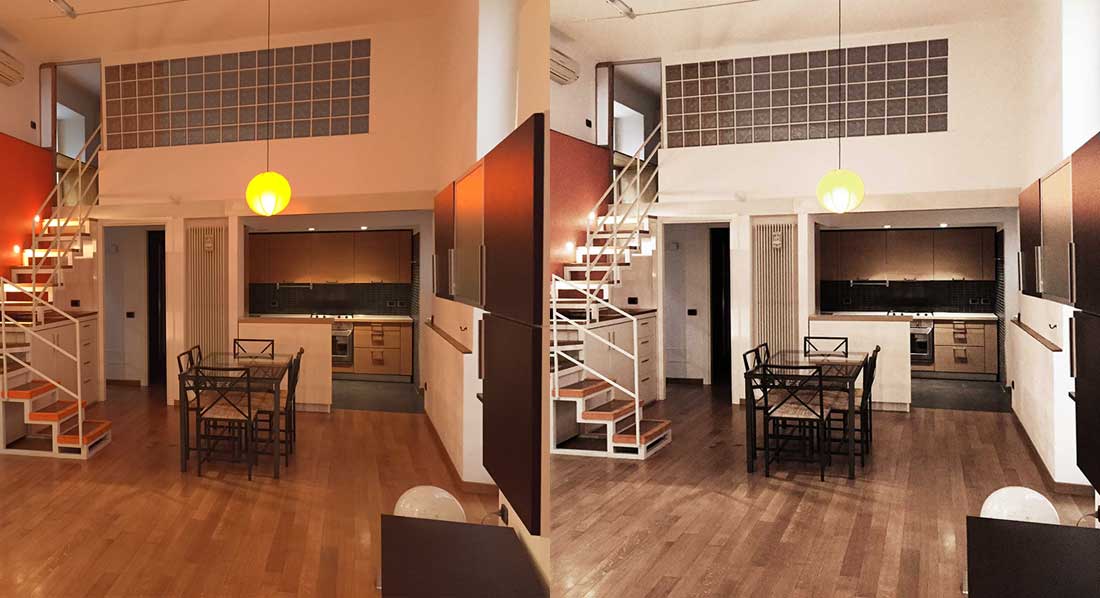
Retouching real estate photos involves enhancing the visual appeal of the property images by making adjustments to various elements such as color, lighting, composition, and overall image quality.
A guide to retouching real estate photos in Photoshop
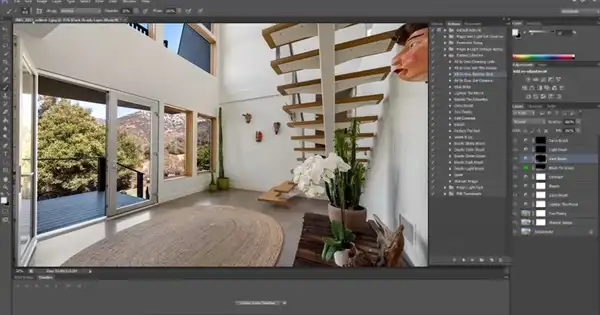 Image enhancers in Photoshop can modify the visual appeal of the property and make it more enticing to potential buyers. Here’s a step-by-step guide on how to retouch real estate photos using Photoshop:
- Import and open the photo: Launch Photoshop and open the real estate photo you want to retouch by going to File > Open.
- Duplicate the layer: In the Layers panel (usually on the right side of the screen), right-click on the background layer and select “Duplicate Layer.” This creates a copy of the original image, which allows you to make non-destructive edits.
- Straighten and crop: Select the Crop tool (shortcut key: C) and straighten the image by aligning it with the horizontal and vertical elements of the property. You can also crop the image to remove any unnecessary or distracting elements.
- Adjust brightness and contrast: Go to Image > Adjustments > Brightness/Contrast. Increase the brightness to brighten up the image if needed. Adjust the contrast to make the details more prominent without losing too much highlight or shadow information.
- Correct color balance: Go to Image > Adjustments > Color Balance. Use the sliders to fine-tune the colors in the image. For example, you can reduce any excessive yellow or blue tones by adjusting the appropriate color balance sliders.
- Remove lens distortion: If your image has noticeable lens distortion, go to Filter > Lens Correction. In the Lens Correction dialog box, switch to the “Custom” tab and use the sliders to correct any distortion or perspective issues.
- Remove distractions: Use the Spot Healing Brush tool (shortcut key: J) or the Clone Stamp tool (shortcut key: S) to remove any distracting elements in the image, such as dust, spots, or small objects that take away from the property’s appeal.
- Enhance details: To bring out the details in the image, duplicate the layer again, go to Filter > Other > High Pass. Adjust the radius slider until you achieve a balance between enhancing details and minimizing noise. Change the blending mode of the layer to “Overlay” or “Soft Light” to blend it with the original layer.
- Sharpen the image: Duplicate the layer once more and go to Filter > Sharpen > Unsharp Mask. Adjust the Amount, Radius, and Threshold sliders until you achieve a desired level of sharpness. Change the blending mode of the layer to “Overlay” or “Soft Light” and adjust the opacity if necessary.
- Save and export: Once you’re satisfied with the retouching, go to File > Save or Save As to save your edited image. If you need to export the photo for web use or print, consider using the “Save for Web” option or exporting it in the appropriate file format (JPEG, PNG, etc.).
Remember, photo enhancer should aim to represent the property accurately while enhancing its appeal. Avoid excessive manipulation that may mislead potential buyers about the actual state of the property.
What is basic photo retouching?
Basic photo retouching refers to the process of enhancing or improving digital photographs using editing software or tools. It involves making subtle adjustments to various aspects of the image to achieve a desired outcome, such as correcting exposure, color balance, sharpness, and removing minor imperfections.
Here are some common techniques and adjustments involved in basic photo retouching:
- Exposure and brightness adjustment: This involves correcting underexposed or overexposed areas of the photo to achieve a more balanced and pleasing tonal range.
- Color correction: Adjusting the color balance and saturation levels to make the image look more natural or to create a specific mood. It involves tweaking individual color channels (red, green, blue) or using global color adjustments.
- Contrast and tone adjustment: Enhancing the image’s contrast to make it more visually appealing and defining the tonal range by adjusting highlights, shadows, and midtones.
- Sharpening: Increasing the apparent sharpness of the image by applying selective sharpening techniques to bring out details and improve overall clarity.
- Noise reduction: Reducing or eliminating digital noise or graininess that can occur in low-light or high ISO settings, resulting in smoother and cleaner images.
- Cropping and composition adjustments: Modifying the framing of the image by cropping unwanted elements or adjusting the composition to improve the visual balance and impact.
- Spot removal: Removing minor distractions or imperfections such as dust spots, blemishes, or small objects that may detract from the main subject.
Basic photo retouching aims to enhance the overall quality of the image while maintaining a natural and realistic appearance. It is often used to improve photographs for personal use, social media sharing, or basic editing requirements before further manipulation or professional retouching techniques are applied.
How retouching real estate photos?
Retouching real estate photos involves enhancing the visual appeal of the images to make the property look more attractive and appealing to potential buyers or renters. Here are some common techniques used in retouching real estate photos:
- Color correction: Adjusting the color balance, saturation, and brightness levels to make the image more vibrant and pleasing to the eye. This involves correcting any color casts and ensuring that the colors in the photo appear natural and true to life.
- Exposure adjustment: Balancing the exposure levels to ensure that the image is properly lit and details are visible. This may involve brightening dark areas, reducing overexposed highlights, and optimizing the overall exposure to create a balanced and appealing look.
- Perspective correction: Correcting any distortions caused by the camera lens or the angle at which the photo was taken. This helps to ensure that the vertical and horizontal lines in the image are straight and the proportions of the room or property are accurate.
- Object removal: Removing any distracting or unwanted objects from the image, such as personal items, clutter, or unsightly elements. This can help to declutter the space and create a more clean and professional appearance.
- Sky replacement: Enhancing the sky in exterior shots by replacing a dull or overcast sky with a more appealing one. This technique can make the property look more inviting and showcase it in the best possible light.
- Virtual staging: Adding virtual furniture, decor, or other elements to vacant or empty rooms to help potential buyers visualize the space better. Virtual staging can give a sense of scale and purpose to the rooms, making them more enticing to viewers.
- Image sharpening: Enhancing the image’s sharpness and clarity to bring out details and make the photo look more professional. This involves carefully adjusting the sharpness and clarity settings without creating artifacts or unnatural-looking results.
- HDR blending: Combining multiple exposures of the same scene to create a high dynamic range (HDR) image. This technique helps to capture a wider range of tones and details, particularly in situations where there are extreme contrasts between light and dark areas.
It’s important to note that while retouching can enhance the appearance of real estate photos, it’s crucial to maintain an accurate representation of the property. Misleading or heavily manipulated images can lead to disappointment or distrust from potential buyers.
Is Adobe Photoshop Elements good for photo editing?
Adobe Photoshop Elements is a capable software program for photo editing. It is designed for users who want to enhance their photos and perform basic to intermediate editing tasks without the complexity and advanced features of the full version of Adobe Photoshop.
Photoshop Elements provides a wide range of tools and features to edit and improve your photos. It offers basic editing capabilities such as cropping, resizing, and adjusting brightness, contrast, and color levels. You can also apply various filters and effects to enhance your images creatively.
Additionally, Photoshop Elements includes features like red-eye removal, spot healing, and the ability to remove unwanted objects from photos. It also offers guided edits, which are step-by-step tutorials that help users achieve specific effects or corrections.
While Photoshop Elements may not have the advanced capabilities and extensive toolset found in the full version of Photoshop, it is still a powerful option for most photo editing needs. It provides a user-friendly interface and is often more affordable than the full version of Photoshop, making it a popular choice for amateur photographers and hobbyists.
What is the property picture?
The phrase “property picture” is not specific enough to determine its exact meaning. It could refer to various things related to property or real estate. Here are a few possible interpretations:
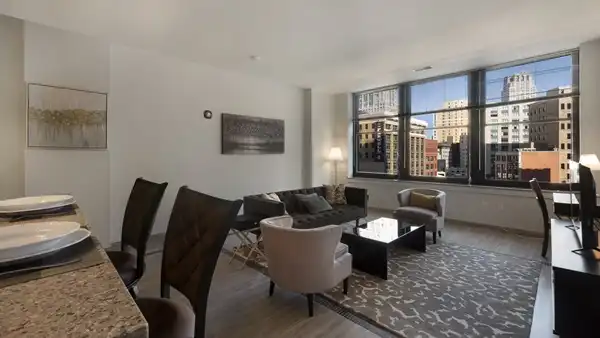
- Real Estate Photography: In the context of real estate, the term “property picture” might refer to photographs taken to showcase a property. Real estate agents often use professional photographers to capture high-quality images of properties for marketing purposes.
- Property Assessment: Property pictures could also be images used for assessing the condition or value of a property. This could include photographs taken by appraisers, insurance adjusters, or property inspectors to document the state of a building or its components.
- Property Listings: Property pictures may be the images displayed in online listings or advertisements for properties that are available for sale or rent. These pictures aim to provide potential buyers or renters with a visual representation of the property’s features and appearance.
- Property Documentation: Property pictures might refer to visual documentation of a property’s features, improvements, or damages. These images can serve as evidence or references for property owners, landlords, or tenants.
A good property photo captures the essence of the property and entices potential buyers or renters to explore it further. Here are some key elements that contribute to a good property photo:
- Composition and framing: The photo should be well-composed with a clear focal point. Use the rule of thirds to position the main elements of the property within the frame. Avoid any unnecessary clutter or distractions.
- Lighting: Proper lighting is crucial for showcasing the property in its best light. Natural light is often preferred, so consider taking photos during the day when the rooms are well-lit. Ensure that the light sources don’t create harsh shadows or overexposed areas.
- Decluttered and staged spaces: Before taking the photo, ensure that the property is clean, well-maintained, and free of clutter. Remove personal items, excess furniture, and any distracting objects. Staging the rooms with tasteful decor can help potential buyers envision themselves living in the space.
- Wide-angle lens: Consider using a wide-angle lens or shooting from a corner of the room to capture more of the space in a single frame. This helps convey a sense of openness and spaciousness, which is appealing to potential buyers.
- Accurate representation: The photo should accurately represent the property, so avoid excessive editing or filters that may mislead viewers. The goal is to provide an honest portrayal of the property’s features, allowing potential buyers to make informed decisions.
- Highlight key features: Focus on capturing the unique selling points of the property, such as architectural details, views, or amenities. Showcase the best aspects of each room, such as large windows, high ceilings, or well-designed kitchens and bathrooms.
- Exterior and surroundings: Include photos of the property’s exterior, landscaping, and any outdoor spaces. Highlight the curb appeal, architectural style, and any special features like a pool or garden.
- Multiple angles: Take photos from different angles to provide a comprehensive view of the property. This helps potential buyers get a better sense of the layout and flow of the space.
- High resolution: Use a camera with good image quality or a high-resolution smartphone to ensure sharp and clear photos. Potential buyers often want to zoom in and examine the details, so higher resolution images are preferred.
- Consistency: If you’re photographing multiple rooms or properties, try to maintain a consistent style throughout the photos. This creates a cohesive visual experience for potential buyers and helps them compare different properties more easily.
Remember, a good property photo should be visually appealing, informative, and inviting. It should capture the essence of the property, showcase its best features, and inspire viewers to take the next step in their property search.
Frequently Asked Questions
Common Queries Unveiled
Q: What is the significance of retouching real estate photos?
Enhancing real estate photos through retouching elevates their visual appeal, attracting potential buyers and setting the property apart in a competitive market.
Q: Can I retouch real estate photos on my own?
Absolutely! With the right knowledge and tools, DIY enthusiasts can master the art of retouching real estate photos, creating stunning visuals for their properties.
Q: How often should real estate photos be retouched?
The frequency of retouching depends on factors like market trends and property updates. Generally, it’s advisable to refresh photos periodically to stay relevant.
Q: What software is best for beginners in real estate photo retouching?
For beginners, Lightroom provides a user-friendly interface with powerful editing capabilities, making it an ideal choice to start with.
Q: Are there any ethical considerations in real estate photo retouching?
Ethical considerations include maintaining accuracy in property representation. Avoid over-editing that may mislead potential buyers about the property’s actual condition.
Q: Can professional retouching services save time for real estate professionals?
Absolutely. Outsourcing retouching to professionals allows real estate professionals to focus on core tasks, while ensuring high-quality, market-ready visuals for their listings.
Insider Tips for DIY Enthusiasts
Embark on your DIY retouching journey armed with insider tips. From selecting the right tools to mastering essential techniques, empower yourself to elevate your real estate photos from ordinary to extraordinary.
Conclusion
Transforming your property imagery through expert retouching is not just a skill; it’s an art. Whether you choose the DIY route or opt for professional services, the impact on your real estate marketing efforts will be nothing short of remarkable. Embrace the power of retouching real estate photos and watch your property listings soar to new heights.