How to edit dog photos in photoshop
 Here are some basic steps to get your editing dog photos in photoshop:
- Open the image of the dog in Photoshop.
- If the image needs to be cropped, use the Crop tool to trim the image to the desired size.
- If the image needs to be straightened, use the Straighten tool or the Ruler tool to align the image.
- If there are any blemishes or distractions in the image, use the Healing Brush or Clone Stamp tool to remove them.
- Adjust the color and brightness/contrast using the Levels or Curves adjustment tools. You can also adjust the color balance and saturation using the Hue/Saturation adjustment tool.
- If you want to change the background, use the Magic Wand or Lasso tool to select the dog and then place it onto a new background using the Move tool.
- If you want to add text or other elements to the image, use the Type tool or Shape tools to create them.
These are just some basic steps, but there are many other tools and techniques you can use in Photoshop to edit a dog or any other image. Experiment with different tools and settings to achieve the desired result.
How to edit dog photos professionally in photoshop
 Editing dog photos in photoshop involves a series of steps that can enhance the overall quality of the image. Here’s a basic guide to get you started:
- Open your dog photo in Photoshop and duplicate the layer: This ensures that you have a backup of the original photo in case you make any mistakes.
- Adjust the levels and color balance: Go to “Image” > “Adjustments” > “Levels” or “Color Balance” to make the necessary adjustments to the image.
- Use the Spot Healing Brush Tool: The Spot Healing Brush Tool is great for removing any unwanted spots or blemishes in the photo. Simply select the tool and brush over the areas you want to remove.
- Use the Clone Stamp Tool: The Clone Stamp Tool is useful for removing larger objects or distractions from the photo. Select the tool and hold down the “Alt” key to select a sample area, then brush over the area you want to remove.
- Apply Sharpening: To make the photo appear crisper and more defined, go to “Filter” > “Sharpen” > “Smart Sharpen” and adjust the settings as necessary.
- Adjust the brightness and contrast: Go to “Image” > “Adjustments” > “Brightness/Contrast” and make the necessary adjustments to enhance the overall appearance of the photo.
- Use Curves Adjustment: Curves is a powerful tool that allows you to adjust the brightness and contrast in a more detailed way. Go to “Image” > “Adjustments” > “Curves” and make the necessary adjustments.
- Add some finishing touches: Add some creative effects like vignettes, borders or filters to give your photo some personality.
- Save your edited photo: Save your edited photo as a new file, so you don’t lose your original image.
These steps should give you a good start to editing your dog photos professionally in Photoshop. With practice, you’ll be able to refine your skills and develop your own editing style.
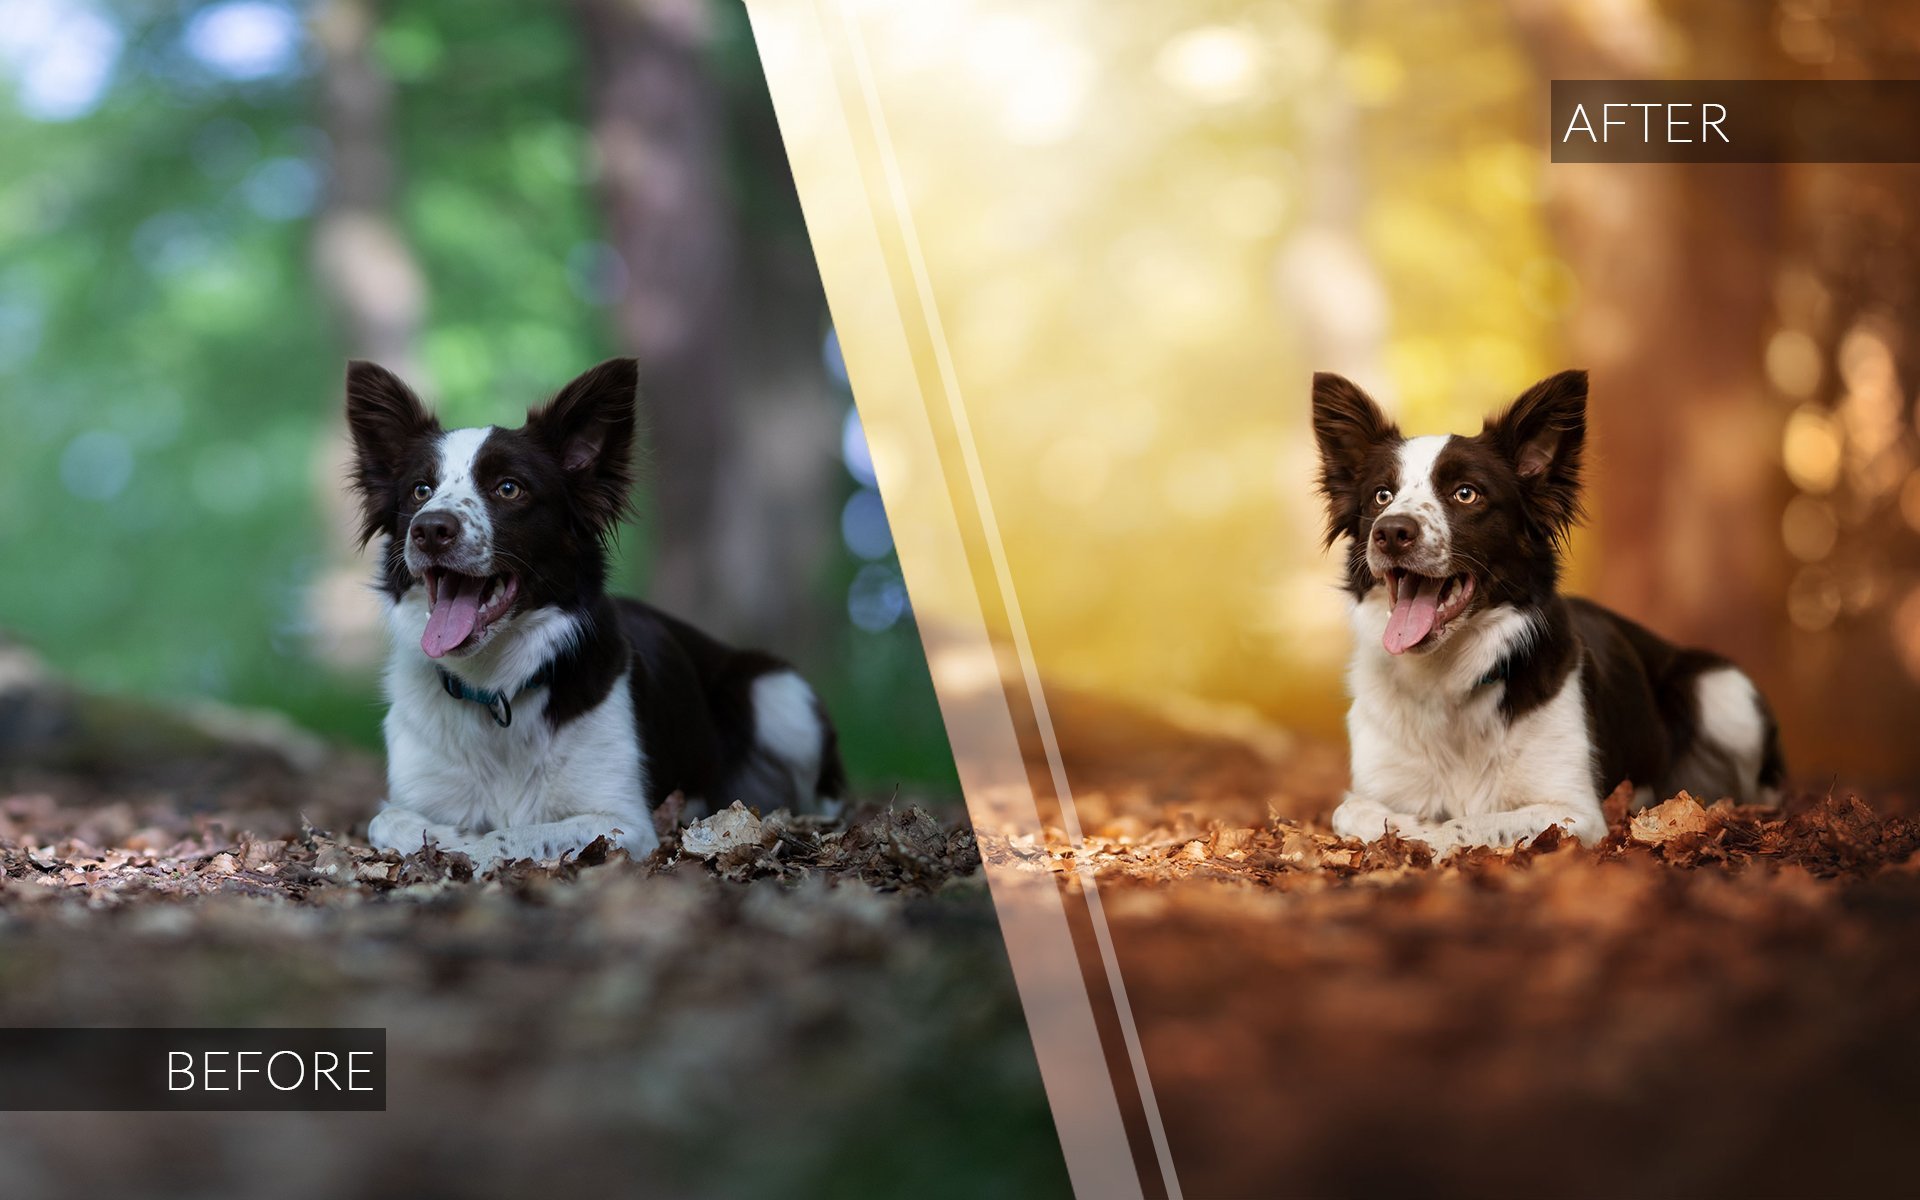
How to edit wildlife photos in photoshop
 Editing wildlife photos in Photoshop can help you enhance the natural beauty and drama of the scene, correct any technical issues, and bring out the full potential of your image. Here are some steps to get you started:
- Open your photo in Photoshop: Start by opening your photo in Photoshop. You can do this by selecting File > Open and browsing for the image on your computer.
- Adjust the exposure: If your photo is too dark or too bright, you can adjust the exposure by selecting Image > Adjustments > Exposure. This will allow you to tweak the brightness and contrast of the image.
- Crop and straighten: If your image has unwanted elements or distracting backgrounds, you can crop the image to eliminate them. You can also use the Crop tool to straighten any crooked horizons.
- Remove noise: Wildlife photos often suffer from noise, especially when taken in low light conditions. You can reduce noise by selecting Filter > Noise > Reduce Noise.
- Sharpen the image: To bring out the details and sharpness of your image, you can use the Sharpen tool. This can be found under Filter > Sharpen.
- Adjust the colors: You can adjust the colors of your image using the Color Balance, Hue/Saturation, or Vibrance tools. This can help you make the colors more vibrant or muted, depending on the effect you’re looking for.
- Add a vignette: A vignette can help draw the viewer’s eye to the subject of your photo. To create a vignette, select Filter > Lens Correction > Custom and adjust the vignette slider.
- Save your edited image: Once you’re happy with your edits, save your image by selecting File > Save or File > Save As.
Remember that editing should always enhance the image and not drastically change it. Be sure to keep the image looking as natural as possible, while bringing out the full potential of the photo.
How to photoshop a dog into a picture
 Here are the steps to photoshop a dog into a picture:
- Choose an image of a dog that you want to add to your picture. Make sure that the size and resolution of the dog image matches the picture you want to add it to.
- Open both images in Adobe Photoshop. To do this, click on “File” in the menu bar, then select “Open” and browse to the location of the images.
- Select the dog image by clicking on it in the Layers panel. Then, use the Move tool (shortcut key V) to drag the dog onto the picture.
- Adjust the size of the dog to fit the picture by selecting the Transform tool (shortcut key Ctrl+T on Windows or Command+T on Mac), then dragging the handles around the edges of the image.
- Use the Eraser tool (shortcut key E) to erase any parts of the dog that overlap with the background of the picture.
- If the colors of the dog and the picture don’t match, use the Hue/Saturation tool (shortcut key Ctrl+U on Windows or Command+U on Mac) to adjust the color of the dog.
- To make the dog look more realistic, use the Blur tool (shortcut key R) to blur the edges of the dog where it meets the background.
- If necessary, adjust the lighting of the dog to match the picture by using the Brightness/Contrast tool (shortcut key Ctrl+B on Windows or Command+B on Mac).
- Once you are satisfied with the placement and appearance of the dog, save the edited picture by clicking on “File” in the menu bar, then selecting “Save As” and choosing a file format (such as JPEG or PNG) and location to save the file.
That’s it! You have now successfully added a dog to a picture using Photoshop.
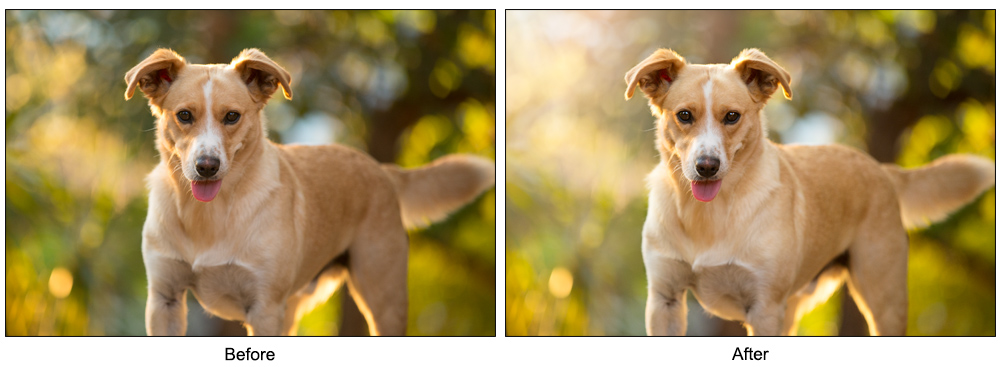
How to edit dog photos in lightroom
 Editing dog photos in Lightroom can enhance the quality and make the photos more visually appealing. Here are some steps to follow to edit dog photos in Lightroom:
- Import the photos into Lightroom: Open Lightroom and click on “Import” to select the photos you want to edit.
- Adjust the exposure: Go to the “Basic” panel in the “Develop” module and adjust the exposure slider to brighten or darken the photo.
- Adjust the white balance: Adjust the white balance to correct any color cast in the photo.
- Increase the clarity: Use the clarity slider to increase the sharpness and definition of the dog’s fur.
- Crop the photo: Use the crop tool to crop the photo and remove any distractions in the background.
- Adjust the saturation and vibrance: Use the saturation and vibrance sliders to adjust the color intensity of the photo.
- Use the adjustment brush: Use the adjustment brush to selectively adjust parts of the photo. For example, you can use the brush to brighten the eyes or enhance the dog’s fur.
- Add a vignette: Use the vignette tool to darken the edges of the photo and draw attention to the dog.
- Export the photo: Once you’re happy with the edits, click on “Export” to save the photo.
Keep in mind that the specific adjustments you make will depend on the original photo and your personal preference. Experiment with different settings and have fun editing your dog photos in Lightroom!
How to edit dog photos online
 There are many ways to edit dog photos online. Here are a few options:
- Use online photo editors: Websites like Pixlr, Fotor, and Canva offer online photo editing tools that allow you to crop, resize, adjust colors, and add filters to your dog photos.
- Use mobile apps: There are many mobile apps available for both iOS and Android that can help you edit your dog photos. Some popular options include VSCO, Snapseed, and Adobe Lightroom.
- Use social media filters: Social media platforms like Instagram and Snapchat have built-in filters that can be applied to your dog photos. Simply upload your photo and select the filter you want to use.
- Use specialized dog photo editors: Some websites and apps are specifically designed for editing dog photos. For example, the app Dog Vision allows you to add fun filters and stickers to your dog photos.
No matter which method you choose, be sure to save a copy of the original photo before you start editing. This way, you can always go back to the original if you don’t like the changes you’ve made.
How to edit dog photos free
 There are several free online photo editing tools that you can use to edit your dog photos. Here are some of them:
- Pixlr Editor: This is a powerful photo editing tool that lets you adjust brightness, contrast, hue, saturation, and more. You can also add filters, effects, and text to your photos.
- GIMP: This is a free and open-source photo editing tool that has many advanced features, such as layer masks, color correction, and image enhancement tools.
- Fotor: This is a user-friendly photo editing tool that lets you edit your photos quickly and easily. It has many features, such as basic editing tools, filters, and effects.
- Canva: This is a design tool that also has photo editing capabilities. It has many templates, backgrounds, and elements that you can use to create beautiful designs and edit your photos.
- BeFunky: This is a fun and easy-to-use photo editing tool that lets you add text, frames, and effects to your photos.
No matter which tool you choose, you should be able to find the basic editing tools you need to adjust brightness and contrast, crop your photo, and make minor color corrections to your dog photos.
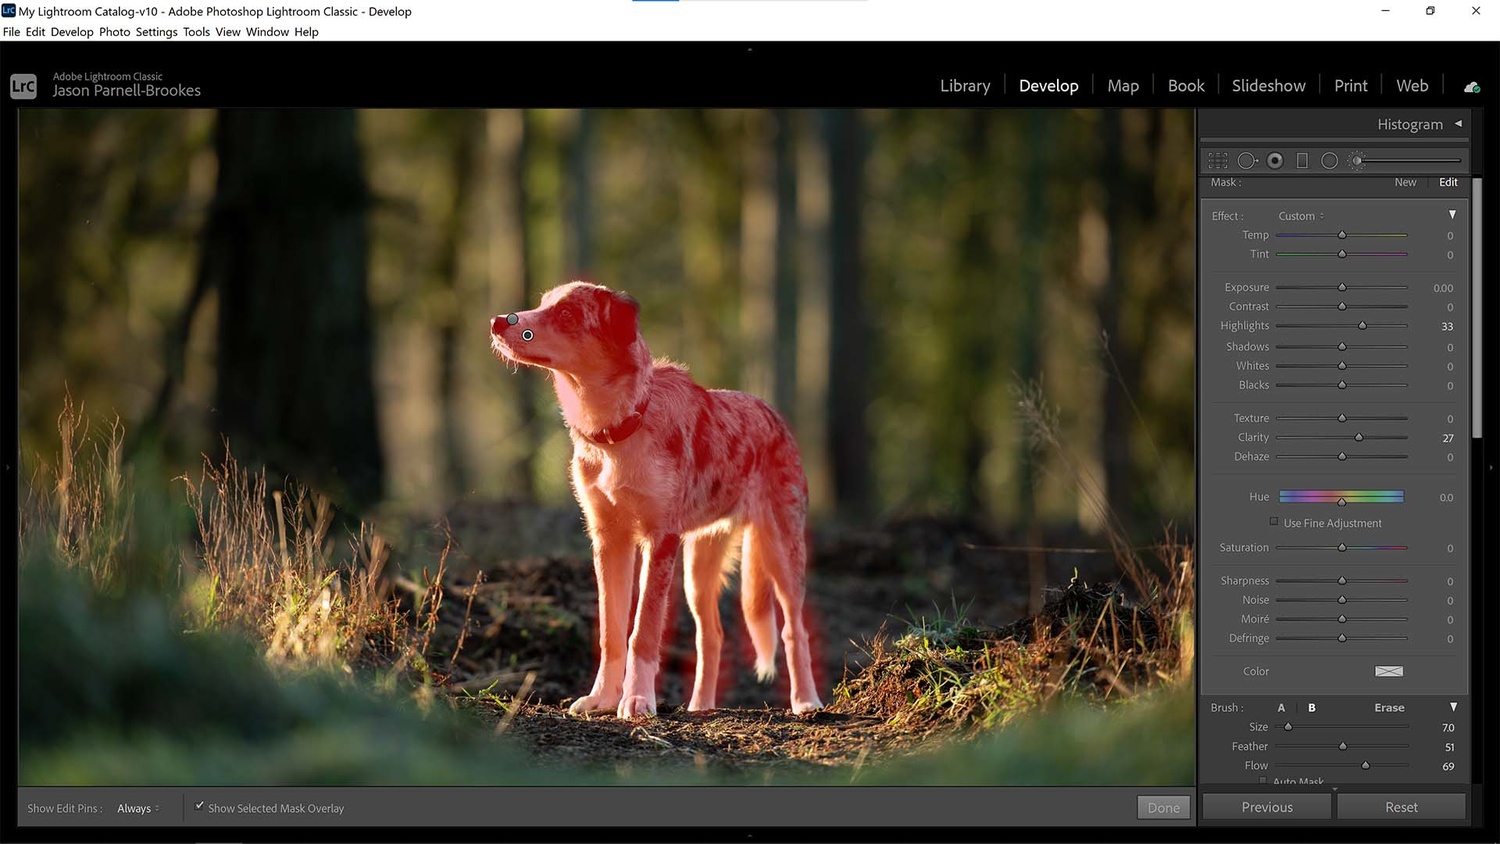
 Photoshop dogs
- Select an Image: Choose a high-quality image of a dog that you want to edit in Photoshop. Make sure you have the necessary permissions or rights to use the image.
- Open Image in Photoshop: Launch Photoshop and open the image you want to edit by going to File > Open.
- Edit Tools: Photoshop provides a wide range of editing tools that you can use to modify the image. Some common tools for editing dogs include the Clone Stamp tool, Healing Brush tool, and Content-Aware Fill. These tools can be used to remove unwanted elements, retouch the image, or enhance specific features of the dog.
- Layers: Use layers to create a non-destructive editing workflow. Create a new layer for each edit you make, so you can easily make adjustments or revert to the original image if needed.
- Adjustments: You can use various adjustment tools in Photoshop, such as brightness/contrast, levels, and curves, to tweak the overall appearance of the image or correct color and lighting issues.
- Filters: Photoshop has a wide range of filters that can be applied to an image to create artistic effects. You can experiment with filters like Blur, Sharpen, and Filter Gallery to add creative touches to your dog photo.
- Collage or Compositing: If you want to create a composite image by combining multiple dog images or adding a dog to a different background, you can use the selection tools, layer masks, and blending modes in Photoshop to achieve the desired effect.
- Save and Export: Once you’re satisfied with the edits, save your Photoshop file (.PSD) for future editing and export the edited image to your desired format (e.g., JPEG, PNG) for sharing or printing.
Remember, photo editing is a skill that requires practice and creativity. Don’t be afraid to experiment and try different techniques to achieve the desired results. Always respect the original image and follow copyright laws when using images from other sources.

Here are some key points to consider when editing pet photos:
- Crop and Composition: Pay attention to the composition of the photo and consider cropping it to remove any distractions or unnecessary elements. Use the rule of thirds to place your pet in an aesthetically pleasing way within the frame.
- Exposure and White Balance: Adjust the exposure and white balance to ensure that your pet’s fur or feathers look natural and well-lit. Avoid overexposure or underexposure that can result in loss of details or color accuracy.
- Color Correction: Adjust the colors in the photo to make them look vibrant and balanced. You can use tools like saturation, contrast, and hue adjustments to enhance the colors of your pet’s coat or feathers.
- Sharpening and Noise Reduction: Apply appropriate sharpening techniques to enhance the details in your pet’s fur or feathers. Additionally, use noise reduction tools to reduce any digital noise that may be present in the image, especially in low-light situations.
- Retouching: Remove any distractions or blemishes from your pet’s photo using retouching techniques. This may include removing stray hairs, dirt, or other imperfections to create a cleaner and more polished look.
- Eye Enhancement: Pets’ eyes are often a key focal point in pet photography. Enhance your pet’s eyes by brightening them, sharpening the details, and enhancing the color to make them stand out.
- Creative Editing: Consider applying creative filters, effects, or other artistic edits to add a unique and personalized touch to your pet photos. However, be cautious not to overdo it, and ensure that the edits still maintain a natural and appealing look.
- Consistency: If you’re editing multiple pet photos as part of a series, strive for consistency in your editing style. This will help create a cohesive look and feel across all the photos.
Remember, editing is subjective, and the specific edits you make will depend on your artistic vision and the desired outcome for your pet photos. Experiment with different techniques and styles to find what works best for your photos and reflects your unique creative style. Always keep a backup of the original photo before making any edits, and don’t be afraid to experiment and have fun with your pet photography editing!
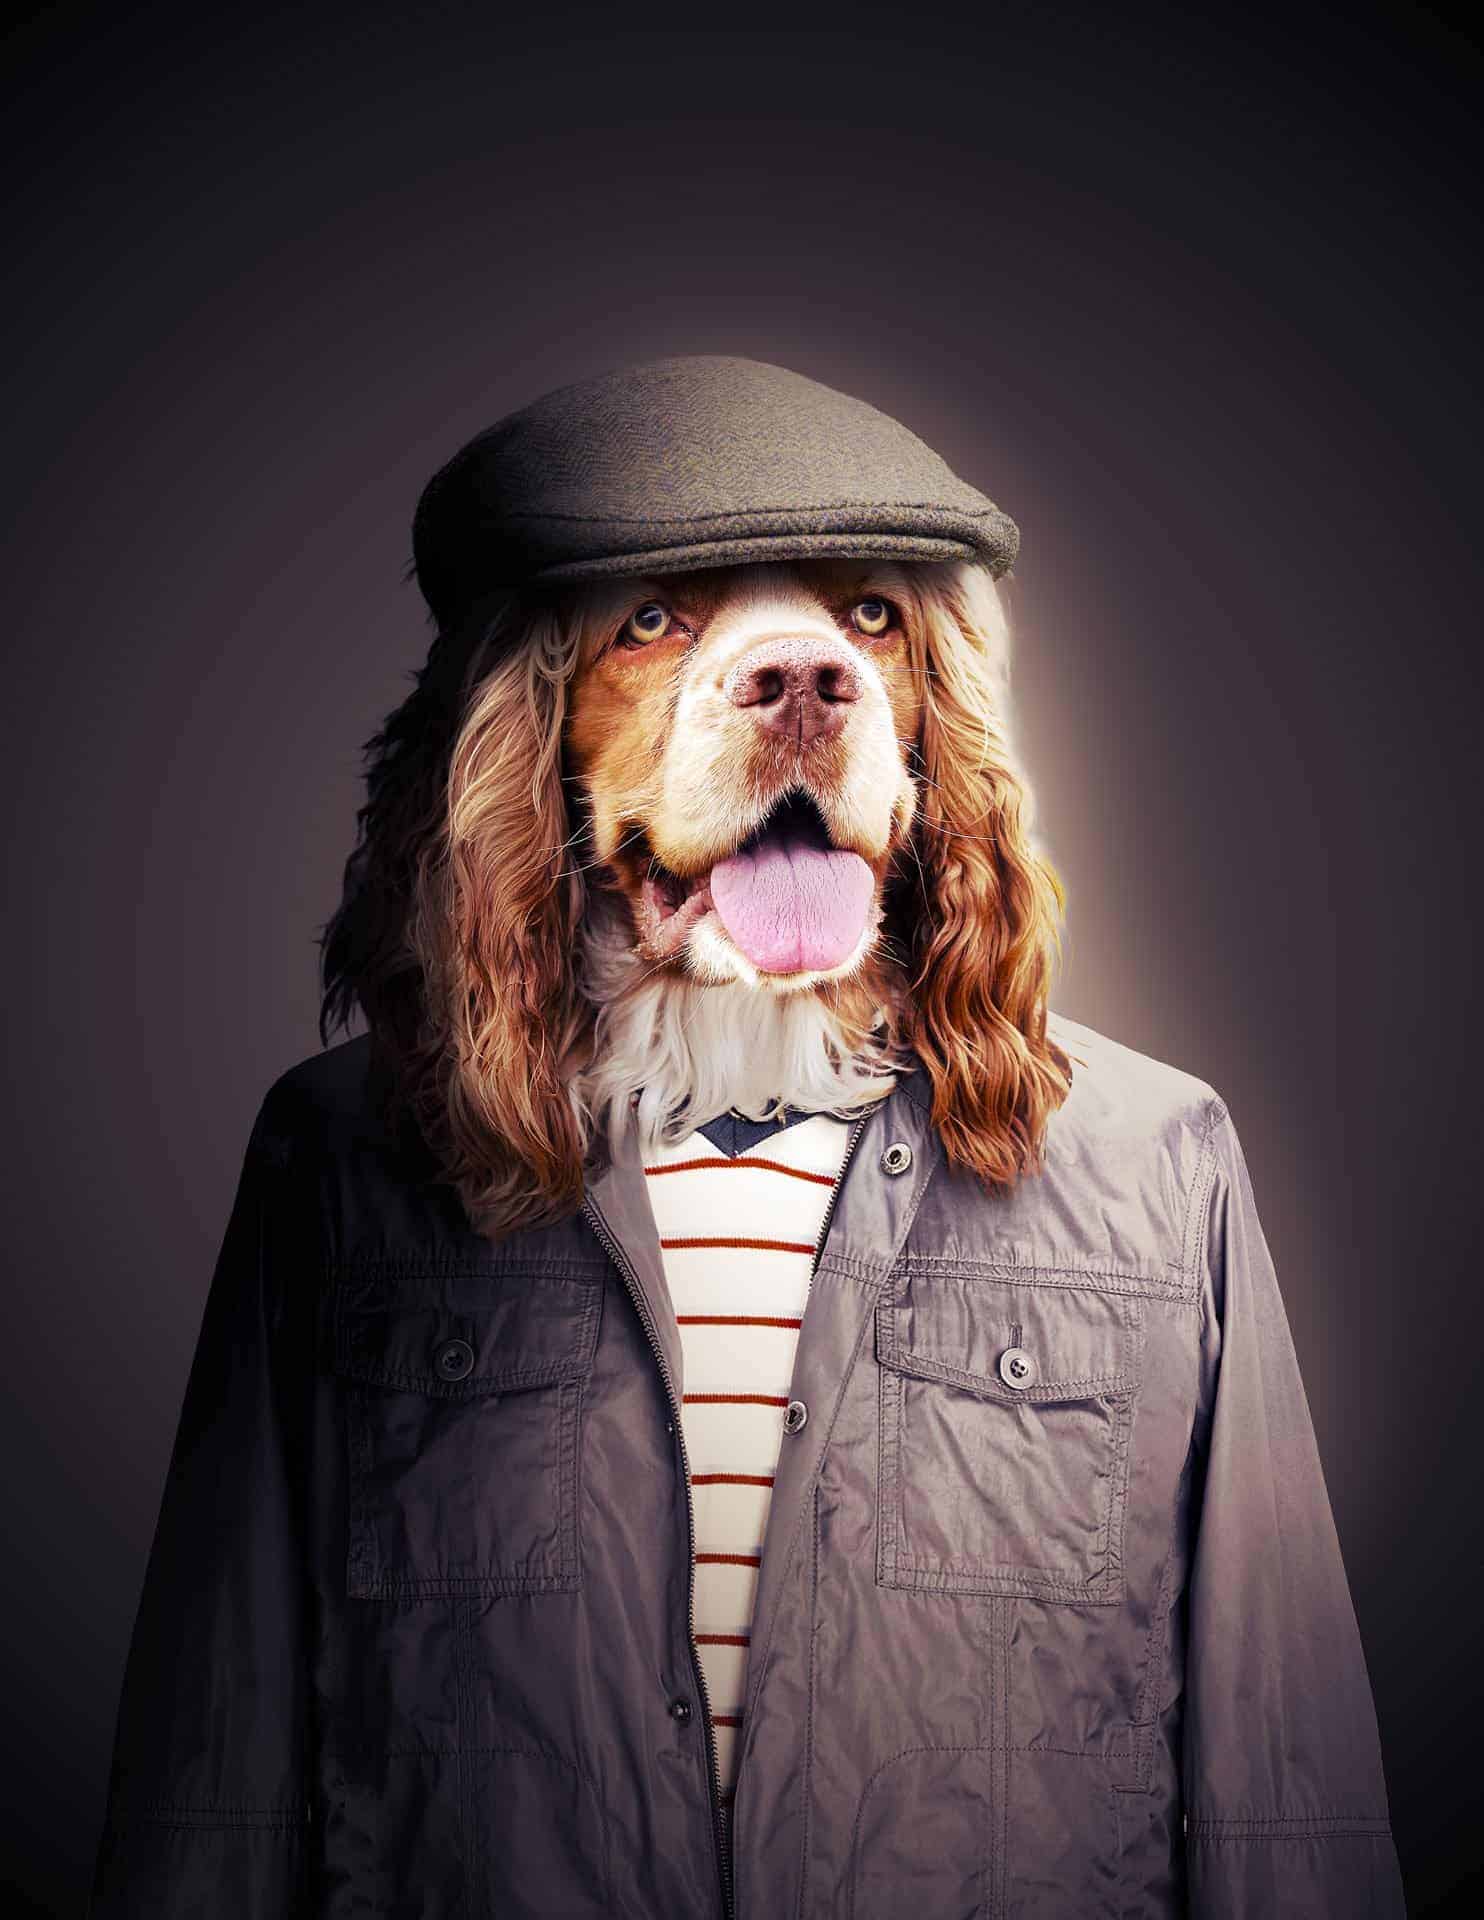
How do I add an animal to a photo?
Adding an animal to a photo can be done using photo editing software. Here are the general steps you can follow:
- Choose the photo you want to edit and the animal you want to add to it. Make sure that the animal photo has a similar resolution and lighting to the main photo to make it look natural.
- Use photo editing software such as Adobe Photoshop, GIMP, or Canva to open both the main photo and the animal photo.
- Use the selection tool (lasso, magic wand, or pen tool) to carefully select the animal in the animal photo. Make sure to refine the edges to make it look natural.
- Copy the selected animal and paste it onto the main photo. Adjust the size and position of the animal to fit the photo.
- Use the layers panel to adjust the opacity of the animal layer and blend it with the main photo. You can also add shadows and highlights to make it look more natural.
- Use the brush tool to paint over any areas that need to be blended better. You can also use the clone stamp tool to copy pixels from one area of the photo to another to hide any seams or inconsistencies.
- Save your edited photo as a new file to preserve the original.
FAQs: Unleashing Answers
How can I make my dog’s fur look more vibrant?
Enhance vibrancy by adjusting saturation levels. Experiment with Photoshop’s Hue/Saturation tool until you achieve the desired color richness.
Are there specific filters ideal for dog photos?
Absolutely! Try the “Doggy Glam” filter for a touch of elegance or the “Pawtrait” filter for a classic look.
Can I edit multiple dog photos simultaneously?
Yes, utilize Photoshop’s batch processing feature for efficiency. Import your images, apply edits to one, and sync changes across the rest.
Is Photoshop suitable for beginners in photo editing?
Certainly! Photoshop offers user-friendly tools, making it accessible for beginners. Start with basic adjustments and gradually explore advanced features.
How can I avoid overediting and maintain a natural look?
Exercise restraint with enhancements. Regularly zoom out to assess the overall balance and ensure your dog’s essence remains authentic.
Any tips for capturing the perfect dog photo initially?
Patience is key. Capture candid moments, experiment with angles, and be prepared for unexpected, heartwarming shots.
Conclusion:
Embark on a journey of creativity and canine companionship as you master the art of editing dog photos in Photoshop. Elevate your photography skills, creating timeless memories of your furry friends that will be cherished for years to come.