There are many funny and creative photos and memes online that depict animals editing photos or using computers. These images are usually meant to be humorous and entertaining, and are often shared on social media or in online forums.
Editing wildlife photos
 Animal pictures can be a great way to enhance their visual appeal and create more impactful images. Here are some tips to help you get started:
- Choose the right software: There are many photo editing software options available, from basic tools like Microsoft Paint to advanced programs like Adobe Photoshop. Choose the one that best fits your needs and skill level.
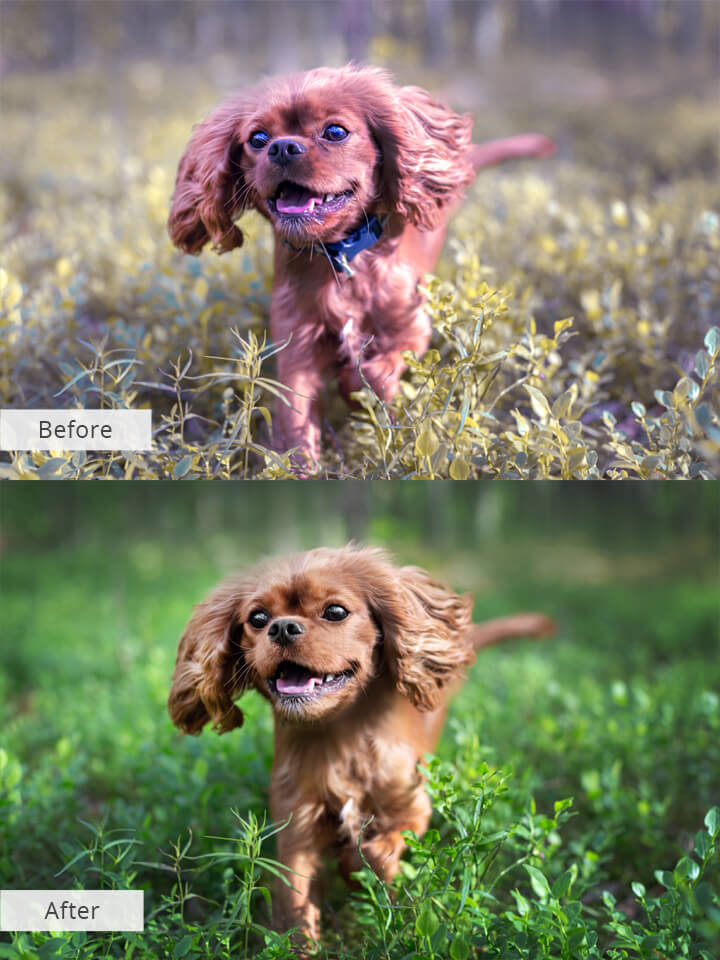
- Crop and straighten: One of the easiest ways to improve a wildlife photo is to crop it to remove any distracting elements and straighten the horizon line. This will give your image a more professional look.
- Adjust exposure and white balance: Make sure your photo has the correct exposure and white balance to bring out the natural colors of the wildlife. Use the software’s tools to adjust these settings as needed.
- Remove blemishes: If there are any unwanted blemishes or distractions in the photo, use the software’s cloning or healing tools to remove them. Be careful not to overdo it, as this can make the photo look artificial.
- Sharpen the image: Finally, use the software’s sharpening tool to bring out the details in the photo. Again, be careful not to overdo it, as this can create an unnatural-looking image.
Remember, the goal of wildlife animals editing photos is to enhance the beauty of the animals and their surroundings. Use your creativity and judgment to make the photo look as natural and appealing as possible.
How to edit animal photos
 Animals editing photos can be a fun and creative way to enhance the quality of your pictures. Here are some general steps you can follow to edit animal photos:
- Choose the right editing software: There are many photo editing software available in the market. You can choose one that suits your needs and budget. Some popular options are Adobe Photoshop, Lightroom, and GIMP.
- Import your photos: Once you have selected your software, import the animal photo that you want to edit into the program.
- Adjust the exposure: Adjust the exposure, brightness, and contrast of the photo to enhance the overall appearance.
- Crop and resize: Use the cropping tool to crop the photo and focus on the animal or the subject. You can also resize the photo to fit your needs.
- Remove blemishes: Use the spot removal tool to remove any blemishes or imperfections on the animal’s fur or skin.
- Adjust the colors: Adjust the colors of the photo to make them more vibrant and pleasing to the eye. You can also use the hue/saturation tool to make specific color adjustments.
- Apply filters: You can apply filters to your photo to give them a unique look. Some popular filters are black and white, vintage, and sepia.
- Save your photo: Once you are satisfied with your editing, save your photo and export it in the desired file format.
Remember, the key to successful photo editing is to be creative and experiment with different tools and effects.
How to edit animal photos in lightroom
 Pic of animals photos in Lightroom is a great way to enhance the colors, tones, and textures of your images. Here are some steps you can follow to edit animal photos in Lightroom:
- Import your photos into Lightroom by clicking the “Import” button in the Library module.
- Select the photo you want to edit and switch to the Develop module by clicking the “Develop” button at the top of the screen.
- Adjust the white balance of your photo using the temperature and tint sliders to ensure that the colors look natural.
- Use the exposure, contrast, highlights, and shadows sliders to adjust the overall brightness and contrast of the photo.
- Use the clarity slider to enhance the texture and details of the animal’s fur or feathers.
- Adjust the vibrance and saturation sliders to boost the colors of the photo.
- Use the adjustment brush tool to selectively adjust specific areas of the photo, such as the eyes or fur.
- Use the noise reduction and sharpening tools to enhance the overall sharpness and clarity of the photo.
- Finally, apply any finishing touches, such as cropping, straightening, or adding a vignette.
Remember that animals editing photos is a subjective process, so experiment with different settings and find what works best for each photo. Don’t be afraid to play around with different adjustments until you achieve the desired result.
Photo editor with animal effects
 There are several photo editors with pictures of animals effects available online, here are some options:
- Fotor – Fotor is a free online photo editor that offers a variety of animal effects to add to your photos. You can choose from animal masks, animal frames, and even animal stickers to enhance your images.
- PiZap – PiZap is another online photo editor that has a range of animal effects. You can add animal ears, noses, and even full animal faces to your photos. PiZap also offers a variety of filters and other editing tools.
- BeFunky – BeFunky is a free online photo editor that has a wide range of animal effects to choose from. You can add animal ears, noses, and even tails to your photos. BeFunky also offers a variety of other editing tools such as text overlays, frames, and filters.
- Animal Face – Animal Face is a mobile app that lets you add animal effects to your photos. You can choose from a variety of animal masks and add them to your photos. The app also offers a range of filters and other editing tools.
- Animal Photo Booth – Animal Photo Booth is another mobile app that lets you add animal effects to your photos. You can choose from a range of animal masks and frames, and even add text and stickers to your photos.
These are just a few examples of animals editing photos with animal effects, but there are many more available online and in app stores.
Editing bird photos
 Editing bird photos can be a fun and rewarding activity, whether you’re a professional photographer or a hobbyist. Here are some tips to get you started:
- Choose the right software: There are many photo editing software options out there, but some of the most popular include Adobe Lightroom, Adobe Photoshop, and GIMP. Choose the software that you feel most comfortable using and that has the features you need.
- Adjust the exposure: One of the most important aspects of any photograph is exposure. Adjusting the exposure can help bring out the details in the feathers and make the bird pop against the background. Use the exposure slider in your software to adjust the brightness of the photo.
- Enhance the colors: Depending on the lighting conditions when you took the photo, the colors of the bird may appear dull or washed out. Use the color saturation and vibrancy sliders to enhance the colors and make them more vibrant.
- Sharpen the details: Birds have many intricate details in their feathers and other features, so sharpening the photo can help bring out these details. Use the sharpening tool in your software to make the bird’s features appear more defined.
- Crop and straighten: Sometimes, the bird may not be centered in the photo or the horizon may be slightly tilted. Use the crop and straighten tools in your software to adjust the composition of the photo.
- Remove distractions: If there are distracting elements in the background of the photo, such as branches or other birds, use the cloning or healing tool to remove them.
- Save your edited photo: Once you’re happy with your edits, be sure to save your photo in a format that preserves the quality, such as a JPEG or RAW file.
Remember, editing bird photos should be fun and creative. Experiment with different settings and techniques to find what works best for you and your style.
Monkey editing photos
 If you are looking for a picture of animals photo editor with features that include adding monkeys to your photos, PicMonkey might be worth checking out. PicMonkey is a photo editor and graphic design maker that offers easy-to-use editing and design tools for creating stunning visuals quickly, no art degree required.
With PicMonkey, you can edit photos, create stylish graphic designs, build your brand, and grow your business, including everything you need for social media. However, we could not find any specific feature that allows you to add monkeys to your photos on this platform.
If you’re specifically interested in adding monkeys to your photos, you may want to check out LunaPic, an online photo editor that offers a clipart search function. LunaPic provides a search feature that allows you to find and add monkeys to your photos, as well as other animal and nature-related clipart. You can access this feature by visiting the LunaPic editor and selecting the “Add Clipart” option, then typing “monkey” into the search bar.
Overall, if you are looking for a animal images photo editing tool with the ability to add monkeys to your photos, LunaPic might be the better option. However, if you are looking for a comprehensive photo editor with numerous other features, including graphic design tools, PicMonkey could be worth considering.
Frequently Asked Questions
How do I get started with animals editing photos?
Embark on your animals editing photos journey by selecting user-friendly editing software and exploring basic tutorials. The key is to start small and gradually experiment with more complex edits.
Are there copyright considerations when editing animal photos?
Yes, it’s crucial to respect copyright laws. Ensure you have the right to use the base images, and if applicable, provide proper attribution to the original photographers.
Can animals editing photos be used for commercial purposes?
Yes, but it’s essential to check the licensing agreements of the original images. Some may have restrictions on commercial use, requiring permission or purchase.
What are the best practices for realistic animals editing photos?
Focus on matching lighting conditions, perspective, and scale. Pay attention to details such as shadows and reflections to achieve a realistic integration.
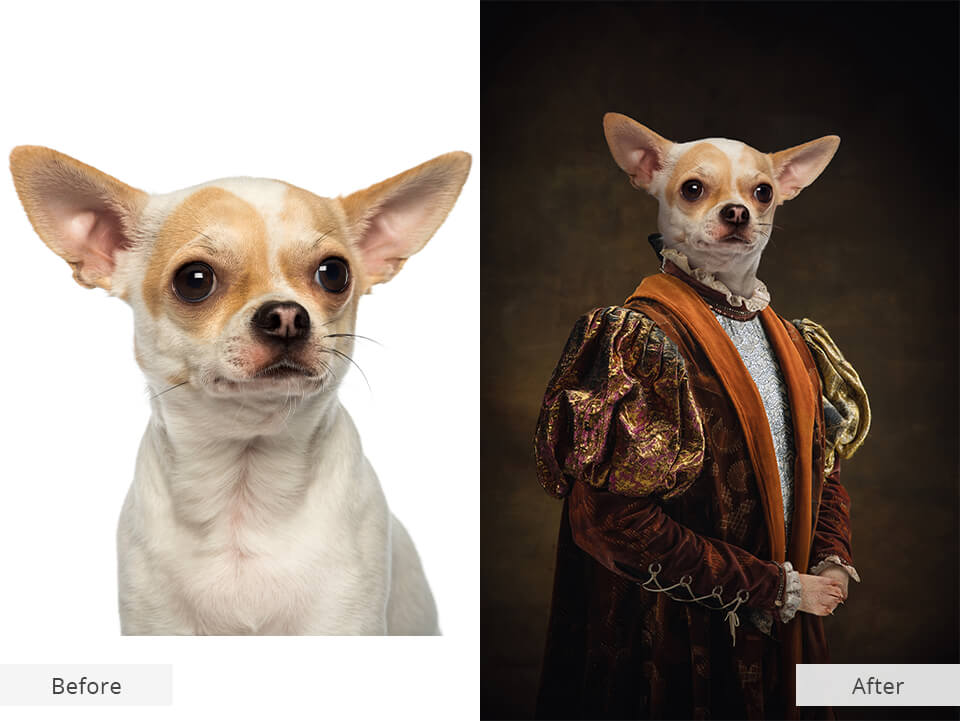
How can I add a storytelling element to my animals editing photos?
Consider the narrative you want to convey. Use composition, expression, and surroundings to tell a compelling story through your edited animal photos.
Are there ethical considerations in animals editing photos?
Respect the dignity and natural behavior of animals. Avoid creating unrealistic or harmful situations in your edits, and promote responsible and ethical editing practices.
Conclusion
In the realm of animals editing photos, creativity knows no bounds. Elevate your photography skills, tell captivating stories, and forge emotional connections through the enchanting world of animals editing photos. Unleash the extraordinary, one edit at a time.